
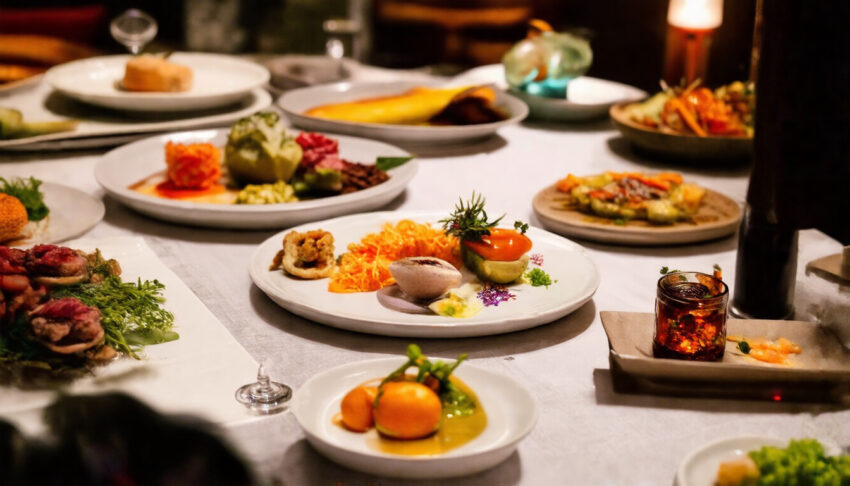
Food photography is an art that transcends mere representation, elevating culinary creations to visual poetry. It weaves together the tactile appeal of food with the emotional connection that flavors evoke. When done well, food photography can tantalize the senses, making viewers feel as though they can almost taste the dish through the image. In this comprehensive article, we will explore the essential elements that contribute to mastering food photography, focusing on practical techniques, artistic expression, and the importance of storytelling through your images. Whether you are a beginner looking to improve your skills or a seasoned photographer seeking new inspiration, this guide aims to illuminate the path toward creating striking food photographs that resonate and captivate.
Key Takeaways
- Mastering food photography begins with a solid understanding of its fundamental concepts.
- Investing in the right equipment can significantly elevate the quality of your food images.
- Lighting plays a crucial role in showcasing the texture and colors of your dishes.
- Effective composition can transform a simple dish into a visually appealing masterpiece.
- Post-processing can enhance your food photos, making them more enticing and professional.
Understanding the Basics of Food Photography
Food photography is a specialized genre that transcends mere documentation of dishes; it is an art form that captures the essence, texture, and aesthetic appeal of food. This type of photography seeks to convey not just the visual beauty of a meal but also the emotions and stories behind it. When executed effectively, food photography can evoke feelings of hunger, comfort, or nostalgia, persuading viewers to appreciate the culinary creations. At its core, food photography involves understanding how to manipulate light, angle, and composition to highlight the unique features of a dish. It is essential to consider color relationships, textures, and the environment in which the food is presented, allowing the viewer to engage with the image on multiple sensory levels.
Essential Equipment for Stunning Food Shots
### Essential Equipment for Stunning Food Shots
When it comes to food photography, the right equipment can make a significant difference in capturing delicious, mouth-watering images that not only highlight the aesthetics of the dish but also tell a story that resonates with the viewer. Here, we will explore the essential gear that can help elevate your food photography to new heights.
Camera: A DSLR or mirrorless camera is generally preferred for food photography due to the versatility and image quality they offer. With the ability to change lenses and manual control over settings, these cameras allow photographers to tailor their work to the specific needs of each scene.
Lenses: While kit lenses can work in a pinch, investing in a macro lens will yield remarkable detail in close-up food shots. A 50mm prime lens is also an excellent choice, providing depth of field and sharpness, while allowing for beautiful background blur.
Tripod: Stability is key in food photography. A sturdy tripod not only helps eliminate camera shake but also allows for creative compositions at various angles, whether you are shooting from above for a flat lay or getting down at eye level with your dish.
Lighting: Natural light is often preferred in food photography for its soft and inviting qualities. If shooting indoors, positioning your setup near a window can bring in that lovely, diffused lighting. However, a good quality softbox or LED light can help control indoor lighting conditions when natural light is unavailable.
Props and Backgrounds: The story in food photography is told not just through the food itself, but also through props and backgrounds. Wooden boards, textured linens, and even colorful plates can enhance the visual interest of your shots. It’s essential to consider how each element in the frame contributes to the narrative of the meal being presented.
Editing Software: Post-processing is a crucial step in food photography. Software like Adobe Lightroom and Photoshop allows for fine-tuning images, adjusting colors, and enhancing details to bring the food images to life while maintaining authenticity.
‘Photography is the story I fail to put into words.’ – Destin Sparks

Lighting Techniques to Enhance Food Presentation
Lighting plays an integral role in food photography, shaping the way colors, textures, and details are presented to the viewer. The delicate interplay between light and shadow can elevate a simple dish into a masterpiece, evoking emotion and appetite. Natural light is often preferred, as it introduces a soft, diffused glow that enhances the food’s intrinsic qualities. When shooting indoors, positioning your setup near a window can create gentle highlights and shadows, showcasing the dish’s depth and vibrancy. For those who shoot in low-light conditions or desire more control over the lighting, artificial lights such as softboxes or LED panels can mimic the effects of soft natural light. Utilizing techniques such as backlighting allows the light to pass through translucent ingredients, such as leafy greens or citrus, enhancing their freshness and luminosity. Alternatively, side lighting emphasizes texture through shadows and highlights, rendering every detail visible, from the glistening glaze of a roasted chicken to the frost on a cupcake. Mastering these lighting techniques not only enhances the visual appeal of food photography but also communicates the story and care that went into preparing each dish.
Composition Tips for Captivating Food Images
In the realm of food photography, composition serves as the backbone of visual storytelling, transforming a mere plate of food into an alluring experience. To create captivating food images that not only entice the viewer’s palate but also evoke emotions and narratives, you can employ specific composition techniques that are essential to the art of photography. Start by considering the rule of thirds; placing key elements—such as the main dish, garnishes, or complementary side items—along the gridlines helps create balance and focal interest. Similarly, explore leading lines by using utensils or the edges of a table to guide the viewer’s eye towards the main subject.
Another effective strategy is to play with negative space, allowing the food to breathe within the frame. This technique provides context and highlights the dish’s intricacies. Experiment with different angles, such as overhead shots for flat lay presentations or 45-degree angles for a three-dimensional portrayal of layered cakes or stacked burgers. Additionally, layering elements within your frame can create depth—be it through the careful arrangement of succulently grilled vegetables or delicate drizzles of sauce that catch the light just right. Finally, always consider the lighting; natural light softens textures and brings out colors, enhancing the overall aesthetic, while artificial light can create a different ambiance. In mastering composition, every food image can become a piece of art that not only pleases the eye but also tells a delicious story.

Post-Processing Techniques to Elevate Your Photos
In the realm of food photography, post-processing techniques play a crucial role in refining and elevating the final images. These techniques transcend mere correction; they breathe life into a photograph, enhancing flavors and textures that might otherwise remain hidden. After capturing the perfect shot, the next step is to fine-tune the image using software such as Adobe Lightroom or Photoshop. Begin by adjusting the exposure and contrast to highlight the tantalizing details of the food, making sure that shadows and highlights are balanced yet striking. Color correction is equally important; rich, vivid hues should evoke the freshness of ingredients, so feel free to play with saturation and vibrance to create an appetizing palette. Techniques like dodging and burning can accentuate the natural gloss of fats or the firmness of textures, drawing the viewer’s eye to the most luscious parts of the dish. Furthermore, applying a subtle vignette can guide the gaze inward, ensuring the food remains the focal point. Don’t forget to soften any harsh edges and add a bit of sharpening where necessary to retain a tactile quality. Ultimately, post-processing should aim not only to enhance aesthetic appeal but to tell a rich, sensory story, inviting viewers to savor the experience long after they have laid eyes on the image.
Common Mistakes to Avoid in Food Photography
When venturing into food photography, avoiding common pitfalls can significantly enhance the quality of your images. Here are several mistakes that many budding food photographers encounter:
1. Ignoring Natural Light: Artificial lighting can often create unwanted shadows and color casts. Always strive to utilize natural light whenever possible, as it adds a dimension of authenticity and warmth that food deserves.
2. Overlooking Composition: Composition is crucial in food photography. One common mistake is placing the subject in the center of the frame. Instead, experiment with the rule of thirds, leading lines, and negative space to create a more dynamic and visually engaging image.
3. Using Unappetizing Props: The choice of props can make or break a food photograph. Avoid mismatched colors or overly complex items that distract from the food itself. Opt for simple plates, utensils, and backgrounds that complement and highlight the dish.
4. Neglecting to Style the Food: Presentation is key in food photography. Skipping the styling phase, such as using garnishes or choosing the right serving angles, can lead to lackluster results. Take the time to arrange your food attractively; small adjustments can yield significant improvements in image appeal.
5. Focusing Too Much on the Food: While the food should be the star of the show, neglecting the context can lead to less compelling images. Consider incorporating elements of the environment or capturing the hands of a person enjoying the dish to create a story within the frame.
6. Rushing the Process: Good photography takes time. Whether it is waiting for optimal lighting, adjusting settings, or thoughtfully arranging a scene, patience is necessary. Rushing through the process often leads to missed opportunities for captivating shots.
7. Poor Post-Processing Techniques: While editing is an important step, over-editing can result in images that look unnatural or overly processed. Maintain a balance with your adjustments, preserving the realism of the food, which is essential in food photography.
Frequently Asked Questions
What basic concepts should I understand before starting food photography?
Before diving into food photography, familiarize yourself with the fundamentals like exposure, aperture, shutter speed, and ISO. These concepts are crucial for capturing well-lit and sharply focused images of your dishes.
What equipment do I need to get started with food photography?
At a minimum, you’ll need a camera (DSLR or mirrorless), a versatile lens (such as a 50mm or macro lens), a tripod for stability, and reflectors to manipulate light. Optional items include a lightbox and props for styling your dishes.
How can I improve the lighting in my food photography?
Natural light is often the best option for food photography. Position your dish near a window where indirect sunlight falls. If shooting indoors, use diffusers or reflectors to soften shadows and enhance details.
What composition tips can I follow to create stunning food images?
Use the rule of thirds to place your dish off-center for a more dynamic composition. Experiment with different angles like top-down or 45 degrees, and don’t forget to include props to add context and interest to your images.
What are some common mistakes to avoid in food photography?
Avoid cluttered backgrounds that distract from the main subject, overexposing your shots, and taking photos in poor lighting. Always style your plate attractively and remember to clean up any spills or crumbs before shooting.