
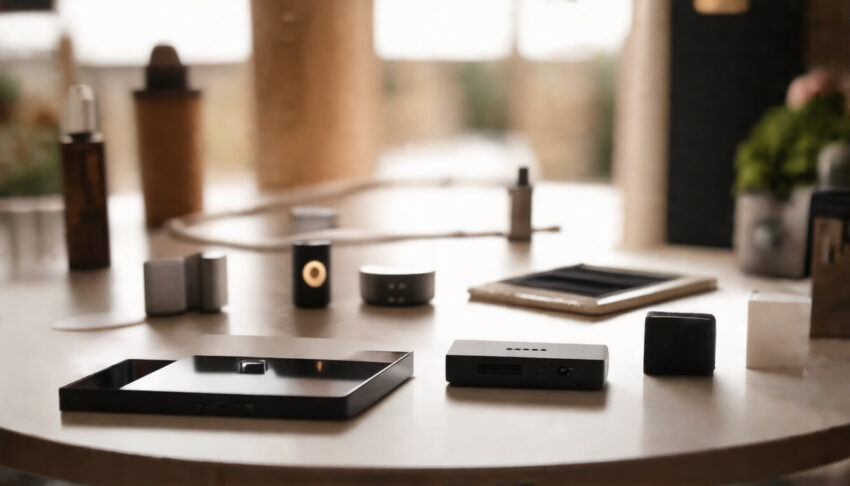
Product photography is more than just a technical skill; it is an art form that marries meticulous attention to detail with a deep understanding of visual storytelling. It is a unique genre that allows us to showcase objects, transforming mundane items into captivating visual narratives that inspire desire and evoke emotion. In today’s digital marketplace, with consumers bombarded by countless products daily, having striking product images can make the difference between a sale and a missed opportunity.
Through this guide, we will explore the fundamental principles and advanced techniques of product photography. We will discuss how to effectively capture the essence of a product, enhancing its features and aesthetic appeal while communicating its story. From the essential equipment needed to the nuances of lighting and composition, each section will equip you with the knowledge to create stunning visuals that not only look appealing but also resonate with your audience on a deeper level.
Whether you are a professional photographer looking to refine your skills, a business owner wanting to enhance your online presence, or a hobbyist seeking to explore a new creative outlet, mastering product photography will empower you to create images that not only attract attention but also tell a compelling story.

Key Takeaways
- Mastering product photography starts with understanding the fundamental principles of visual presentation.
- Investing in the right equipment is crucial for capturing high-quality product images.
- Proper lighting techniques can significantly enhance the features and appeal of your products.
- Experiment with different angles and backgrounds to find the most flattering compositions for your shots.
- Post-processing can refine your photos, but it’s essential to avoid common mistakes to maintain authenticity.
Understanding the Basics of Product Photography
Product photography is a specialized genre of photography that focuses on capturing images of products in a way that highlights their features and conveys their intended use. Its primary goal is to attract and engage potential customers, making it a critical component of marketing and e-commerce strategies. Effective product photography combines technical skill with artistic vision, creating images that are not only visually appealing but also informative. The importance of this discipline can be seen in its ability to enhance brand identity, communicate product value, and influence consumer behavior. This article will delve into the core principles of product photography, exploring the technical aspects of equipping yourself for the task, creating engaging compositions, and capturing the emotional resonance of the product in its intended context.
Essential Equipment for Capturing High-Quality Images
When embarking on the journey of product photography, selecting the right equipment is paramount to achieving high-quality images that convey the essence of the subject. Central to this craft is a dependable DSLR or mirrorless camera, which offers the versatility and control needed for precise exposures and sharp details. A lens with a focal length ranging from 50mm to 100mm is optimal for product shots, as it minimizes distortion while allowing for close focusing on details without the interference of your presence impacting the shot. Add to this a sturdy tripod to eliminate camera shake, essential for long exposures or low-light conditions.
Moreover, proper lighting is crucial; consider investing in continuous LED lights or a professional softbox setup to illuminate your products evenly and avoid harsh shadows. Reflectors can also enhance this lighting, helping to fill in any unwanted shadows. A light tent can further assist in diffusing light and creating a controlled environment, which is particularly useful for smaller items.
This combination of camera, lens, tripods, and lighting not only facilitates technical excellence but also supports the artistic vision required to convey the story of each product. Understanding how to effectively use this equipment allows photographers to capture stunning images that resonate emotionally with viewers, transforming ordinary products into captivating visual narratives.
‘Photography is the story I fail to put into words.’ – Destin Sparks

Lighting Techniques to Enhance Product Features
### Lighting Techniques to Enhance Product Features
Product photography is more than merely capturing an object; it is about showcasing the features that define its character and appeal. The importance of lighting in product photography cannot be overstated, as it is a crucial element that can dramatically alter the perception of an item in an image. Understanding various lighting techniques can elevate your product photography from basic documentation to captivating visual storytelling.
To begin, natural light is a popular choice for product photography, particularly when aiming for soft, even illumination that flatters the subject. Placing products near a window allows for the diffusion of light, resulting in lovely shadows that add depth to the image. Overcast days are ideal, as the clouds act as a natural diffuser, eliminating harsh contrasts and creating a pleasing ambiance. However, if you aim for more control, artificial lighting methods such as softboxes or LED panels can be employed to achieve consistent effects irrespective of external conditions.
When dealing with reflective surfaces, such as glass or metallic objects, lighting becomes even more critical. Using a soft box placed at an angle can help to minimize glare while highlighting the texture and colors of the product. Moreover, experimenting with backlighting can create a silhouette effect that emphasizes shapes and features, offering an artistic twist that draws viewers in.
For those who want to accentuate specific characteristics of their products, consider using side lighting. It brings out details and textures that might remain hidden under front lighting. This technique can be particularly effective for products like fabrics, where the weave and material can be faithfully represented, creating a sense of touch through the visual medium. Another option is to use a reflector, placed opposite the light source, to fill in shadows without overwhelming the image with additional luminescence.
Finally, remember that color temperature plays a vital role in conveying the product’s true essence. Experiment with daylight-balanced lights (around 5500K to 6000K) for a natural look, or warm lights (around 3000K to 3200K) if the goal is to evoke coziness and mood. By harmonizing the lighting with your product’s colors, you can create a cohesive image that resonates with your intended audience, ultimately enhancing the viewer’s connection to the product.
Composing Your Shots: Angles and Backgrounds
Composing your shots in product photography requires a keen eye for angles and backgrounds. The choice of angle can dramatically influence the perception of the product, shaping its appeal and character. For instance, shooting from a lower angle can impart an imposing presence to the item, making it seem larger and more dominant, whereas a top-down view may present it in a more casual, inviting context, ideal for showcasing a collection of items in flat-lay compositions.
Background selection is equally crucial; the right backdrop should enhance the product rather than distract from it. A simple, neutral background often works best for minimalist designs, while textured or colored backdrops may serve to evoke emotions or tell a story. Using gradients or props that complement your subject can add depth and interest, creating a visual narrative that engages the viewer. Furthermore, playing with focus—blurring the background slightly with a shallow depth of field—can emphasize the product, drawing the viewer’s eye directly to it. Ultimately, careful consideration of angles and backgrounds in product photography not only showcases the product’s aesthetic qualities but also imbues the image with a sense of purpose and intentionality, inviting viewers to appreciate not only the item but the artistry behind its presentation.
Post-Processing Tips for Polishing Your Photos
Post-processing is a crucial stage in the product photography workflow, transforming your images from mere captures into polished works of art that draw attention and evoke emotion. The initial phase of capturing product photography involves meticulous lighting and composition, but the magic often happens in post-processing, where you can refine your photos to better represent the product’s features and engage the audience visually. This section will cover essential post-processing tips to enhance your product images, making them not only visually appealing but also effective in communicating the products’ essence and purpose.
Firstly, consider utilizing software like Adobe Lightroom or Photoshop. These tools offer powerful editing capabilities that can elevate your product photography significantly. Begin by adjusting the exposure and contrast; ensuring your product is neither overexposed nor too dark can highlight its best features. Proper exposure will create a vivid representation of the product, allowing colors to pop and details to enhance.
Next, focus on the colors. Using the white balance tool can correct any color casts present in your images, aligning the colors closely with their real-life counterparts. Accurate colors are vital in product photography as they greatly influence purchasing decisions. After balancing the colors, consider adjusting vibrance and saturation levels carefully—not too much, as this can create unrealistic visuals.
Sharpening your images is another step that adds clarity and crispness to details such as textures and edges. However, moderation is key. Over-sharpening can lead to unnatural images and distracting artifacts. A subtle increase in sharpness can enhance the appearance of fabric texture or intricate product designs without compromising realism.
Incorporating a gentle vignette can draw attention to the product itself. This technique involves darkening the edges of the photo slightly, subtly guiding the viewer’s focus towards the center. Similarly, if the background is cluttered or distracting, consider applying a slight blur to ensure the product remains the focal point.
Lastly, don’t forget the importance of cropping. A well-considered crop can improve composition by getting rid of unnecessary elements while maintaining balance in the image. This can also allow you to highlight specific features or showcase different angles of the product. By applying these post-processing tips, your product photography can achieve a polished, professional aesthetic that effectively attracts and engages viewers.
Common Mistakes to Avoid in Product Photography
In the realm of product photography, there are several common pitfalls that aspiring photographers often encounter, which can significantly detract from the quality and effectiveness of their images. First and foremost, inconsistent lighting is a frequent mistake; failing to use a consistent light source can lead to shadows and highlights that distract from the product. Utilizing natural light can be enchanting, but it requires planning and awareness of changing conditions. Another prevalent error is neglecting the background; a busy or cluttered backdrop can overshadow the product itself. Ideally, backgrounds should enhance without overpowering. Additionally, improper focus can leave products looking unappealing or unprofessional. Always ensure your product is the focal point by using the appropriate depth of field. Moreover, photographing products without accounting for their scale can confuse viewers; incorporating familiar objects for size reference is vital. Lastly, many photographers overlook the importance of post-production. Even if the shot is technically sound, failing to edit for color balance, cropping, and sharpening can result in a lackluster image. By being vigilant about these common mistakes, photographers can elevate their product photography and effectively communicate the essence of their subjects.
Frequently Asked Questions
What is product photography and why is it important?
Product photography is the practice of capturing images of products in a way that highlights their features and details for marketing and advertising purposes. It is important because high-quality visuals can significantly influence consumer purchasing decisions and enhance brand image.
What essential equipment do I need for product photography?
Key equipment for product photography includes a good camera (DSLR or mirrorless), a tripod for stability, macro lenses for close-up shots, lighting equipment such as softboxes or LED lights, and a backdrop to create a clean and professional look.
What lighting techniques should I use to enhance my product photos?
Using natural light can be effective, but for consistent results, consider using artificial lighting. Soft lighting helps reduce harsh shadows. Experiment with diffusers to soften light and use reflectors to fill in shadow areas. Always try to avoid direct sunlight as it can create unwanted glare.
How can I compose my shots for the best results?
When composing product shots, consider different angles to showcase your product’s features. Use the rule of thirds to create balanced images, and choose backgrounds that complement your product without distracting from it. Clean and simple backgrounds often work best.
What are some common mistakes to avoid in product photography?
Common mistakes include poor lighting, using busy or distracting backgrounds, not paying attention to details such as dust or smudges on the product, and failing to edit images properly. Always review your setup and final edits to ensure professional quality.