
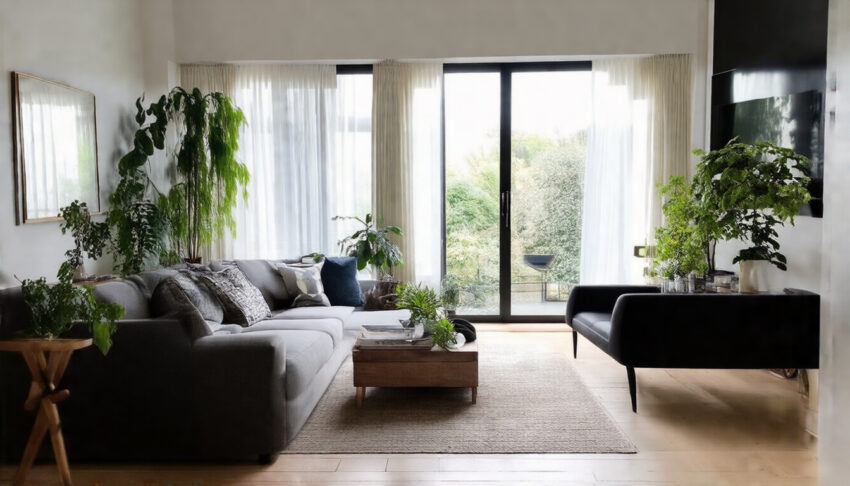
In the competitive world of real estate, the imagery used to present a property can make all the difference in attracting potential buyers. Real estate photography is not merely about documenting spaces; it is a sophisticated art form that combines technical skill with an understanding of emotional resonance and aesthetic appeal. Quality photographs can evoke feelings of welcome, comfort, and charm, turning a simple listing into a compelling narrative that invites viewers to imagine their lives within those spaces. As we delve into the nuances of real estate photography, we will uncover essential techniques, equipment, and editing strategies that work harmoniously to create stunning visuals that resonate with buyers. Let us embark on this journey to unlock the full potential of real estate photography.
Key Takeaways
- High-quality real estate photography is crucial for attracting potential buyers.
- Investing in the right equipment can significantly improve the quality of your images.
- Utilizing effective techniques can help create inviting and engaging interior shots.
- Natural light enhances real estate images, making them more appealing to prospective buyers.
- Editing can elevate photos, making them stand out and boosting the property’s presentation.
Understanding the Importance of Real Estate Photography
In the realm of real estate, first impressions can make or break a sale. Real estate photography serves as a critical element in capturing potential buyers’ attention, allowing properties to shine in the competitive market. This genre of photography transcends mere documentation; it is an art form that combines technical skill with visual storytelling to create images that evoke emotion and desire. A well-crafted photograph has the power to convey the essence of a space, highlighting its architectural features, ambiance, and context—such as proximity to local amenities or stunning views. As buyers increasingly rely on online listings, the quality of real estate photography can significantly influence their perception and ultimately their decision-making process. Thus, understanding and mastering the essentials of real estate photography is indispensable not only for photographers but for homeowners, real estate agents, and property developers alike.
Essential Equipment for Stunning Real Estate Photos
To capture stunning real estate photography, having the right equipment is paramount, as it enables you to create images that highlight a property’s best features while delivering a professional finish. First and foremost, a high-quality digital camera is essential. A full-frame DSLR or mirrorless camera is recommended because it offers superior image quality, especially in low-light situations, which are common in interior shots. Pair your camera with a wide-angle lens, ideally in the range of 14-24mm for full-frame sensors, to effectively showcase the expansiveness of rooms and create a welcoming perspective for viewers.
In addition to the camera and lens, consider using a sturdy tripod. This helps maintain stability during longer exposure times, particularly in dimly lit environments where getting sharp images without a shake becomes a challenge. A tripod also aids in aligning shots consistently, which is crucial for creating thorough property listings.
Lighting equipment should not be overlooked either. External flashes or softboxes can significantly enhance indoor shots by illuminating darker corners and balancing light throughout the space, especially in dimly lit areas. Additionally, reflectors can be used to bounce light, creating a natural and inviting atmosphere.
Finally, invest in post-processing software, such as Adobe Lightroom or Photoshop. Post-processing tools allow you to fine-tune your images, correcting exposure, enhancing colors, and ensuring that the property looks its absolute best. By combining a solid camera setup, appropriate lighting, and effective editing software, you lay the groundwork for capturing breathtaking real estate images that attract potential buyers.
‘A picture is worth a thousand words.’ – Fred R. Barnard
Techniques for Capturing Inviting Interior Shots
# Techniques for Capturing Inviting Interior Shots
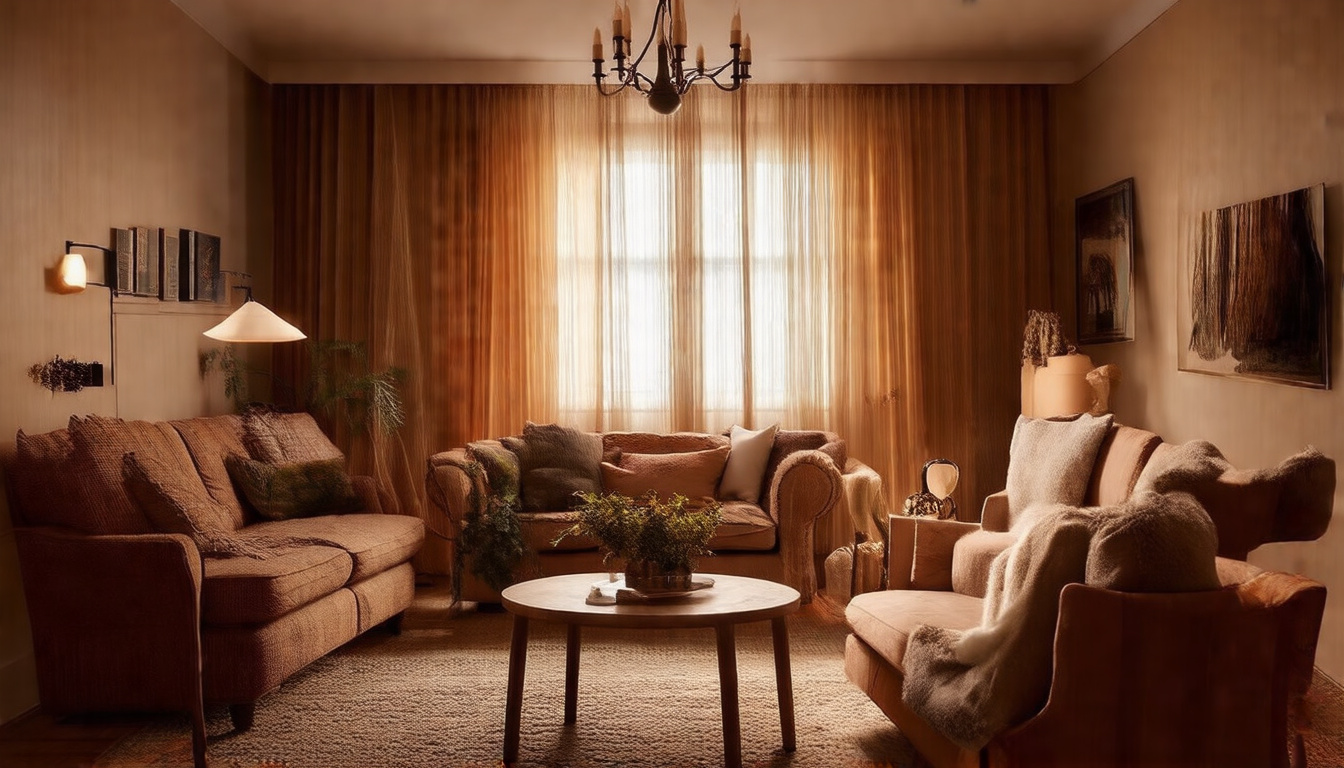
When it comes to real estate photography, the objective is to create an inviting atmosphere that allows potential buyers to envision themselves within the space. Capturing interior shots effectively involves understanding not just the technical aspects of photography, but also how to convey warmth and allure through visual storytelling.
### What Is Real Estate Photography
Real estate photography is a specialized genre dedicated to showcasing properties for sale or rent, often aiming to highlight their best features while attracting viewer interest. This form of photography typically involves various styles and techniques to ensure spaces look their best, inviting potential buyers to engage emotionally with the property. For instance, an open-plan living area with ample natural light might be shot during golden hour to enhance its allure, while a cozy reading nook would be framed to emphasize comfort and tranquility.
### Technical Breakdown
Capturing inviting interior shots requires attention to several critical technical aspects:
• Camera Settings: Ideally, use a DSLR or mirrorless camera with a wide-angle lens (between 16mm and 24mm). Set your aperture around f/8 to f/11 to ensure more of the scene is in focus, which is crucial for interior shots where the depth of field can enhance detail.
• Lighting: Natural light is paramount. Position your shots near windows during daylight hours to benefit from soft, diffused light. If necessary, complement natural light with soft artificial sources, avoiding harsh shadows that can detract from a welcoming ambiance.
• Composition: Use the rule of thirds to create balanced and harmonious images. Include leading lines and frames within the space (like doorways or windows) to guide the viewer’s eye deeper into the scene.
### Storytelling and Emotional Impact
Photography is inherently a narrative art form, utilizing still images to convey a story. In the realm of real estate, each photograph should evoke a sense of belonging and possibility. A well-composed shot can communicate the lifestyle associated with the home: a beautifully arranged kitchen hints at joy during family meals, while a tranquil bedroom presents a peaceful refuge. To achieve this, aim to capture not just the physical attributes, but also the essence of the living space that contributes to a potential homeowner’s vision of their life within it.
### Step-by-Step Guide
1. Preparation: Prior to shooting, declutter the space and arrange furniture for optimal flow. Consider adding fresh flowers or cushions to enhance warmth.
2. Choose the Right Time: Time your shoot for late morning or early afternoon for optimal light, or during golden hour for a softer ambiance.
3. Set Up Your Camera: Use a tripod to prevent shake and ensure a consistent setup. Adjust your settings based on light availability and desired depth of focus.
4. Frame Your Shots: Look for interesting angles and perspectives to showcase features. Capture wide shots to emphasize space and detail shots to highlight unique features.
5. Post-Processing: Edit images to adjust brightness, contrast, and color balance, ensuring they remain true to the property’s real colors while amplifying their inviting nature.
### Common Mistakes to Avoid
• Neglecting Lighting: Poor natural lighting can lead to dull, lifeless images. Always prioritize natural light and strategic lighting setups.
• Cluttered Spaces: Ensure all spaces are clean and free from distractions that might detract from the image.
• Over-Editing: While post-processing is essential, over-enhancing images can lead to unrealistic portrayals that may frustrate potential buyers.
### Creative Ideas and Use Cases
• Feature Lifestyle: Incorporate elements that suggest lifestyle, such as a table set for dinner or a comfortable reading nook. This sparks the viewer’s imagination.
• Twilight Shots: Capture exteriors around sunset to provide a beautiful glow that attracts attention.
• Action Shots: Capture an occupant (or a model) engaged in a typical activity, such as cooking or lounging, to make spaces relatable and inviting.
### Tips From Professional Photographers
• Always scout locations before shooting; understanding the layout can lead to better shot compositions.
• Experiment with different heights and angles; sometimes the most compelling images come from unexpected viewpoints.
• Maintain a consistent style throughout your portfolio to enhance brand identity and attract your ideal clientele.
### Frequently Asked Questions
• What lens is best for real estate photography? A wide-angle lens (16-24mm) is ideal for capturing more of a space without distortion.
• How do I make small spaces look larger? Use wide-angle lenses, shoot from low angles, and avoid clutter to create an illusion of space.
• Can I shoot in low light conditions? Yes, but ensure you have a tripod to stabilize your camera, and consider using additional lighting to enhance the scene.
• What editing software do you recommend? Popular choices include Adobe Lightroom and Photoshop, both offering extensive editing capabilities to enhance images.
• How important is staging? Staging can significantly impact how spaces are perceived; well-placed furniture and décor can invite potential buyers to envision a home within the property.
### Final Thoughts
Mastering real estate photography involves a harmonious blend of technical skills and an artistic eye. By emphasizing inviting elements and drawing viewers into your images, you can create compelling visual stories that resonate emotionally, making properties not just seen but felt.
The Role of Natural Light in Real Estate Photography
Natural light plays a crucial role in real estate photography, dramatically influencing both the aesthetic quality and emotional resonance of the images captured. In contrast to artificial lighting, which can often impart harshness or unpredictability, natural light offers a softer, more flattering illumination that showcases properties in their best possible form. The time of day when photos are taken can create varying moods and atmospheres; golden hour, the period shortly after sunrise or before sunset, casts a warm glow that enhances textures and details, inviting potential buyers to envision their lives within the space. Utilizing natural light effectively requires an understanding of essential factors such as window placement, the direction of sunlight, and the interplay of shadows. When harnessed correctly, natural light not only highlights architectural features but also imbues photographs with a sense of authenticity and warmth, making spaces feel inviting and lived-in.
Editing Tips to Enhance Real Estate Images
In the competitive world of real estate photography, post-processing can make the crucial difference between an average image and one that captivates potential buyers. Mastering the art of editing extends beyond mere correction; it is about enhancing the visual narrative of a property and presenting it in its best light. To breathe life into your images, consider starting with a clean workflow that organizes your files for easy access. When it comes to software, Adobe Lightroom and Photoshop are staple tools that provide a comprehensive suite for editing.
Begin your editing by adjusting the basic settings, such as exposure, contrast, and white balance. Achieving natural tones is vital in presenting properties authentically. Utilize features like the histogram to measure highlights, shadows, and overall exposure. Next, refine your composition using cropping and perspective correction tools to straighten lines and remove distractions, which is particularly important in real estate photography where architectural lines can sell a property.
After the foundational adjustments, experiment with local adjustments to bring focus to key elements of the space. Brushes and gradients allow you to selectively brighten rooms or add warmth to a sunset view from a window. Don’t forget to enhance the details; sharpening and noise reduction can help accentuate textures without making the image feel over-processed.
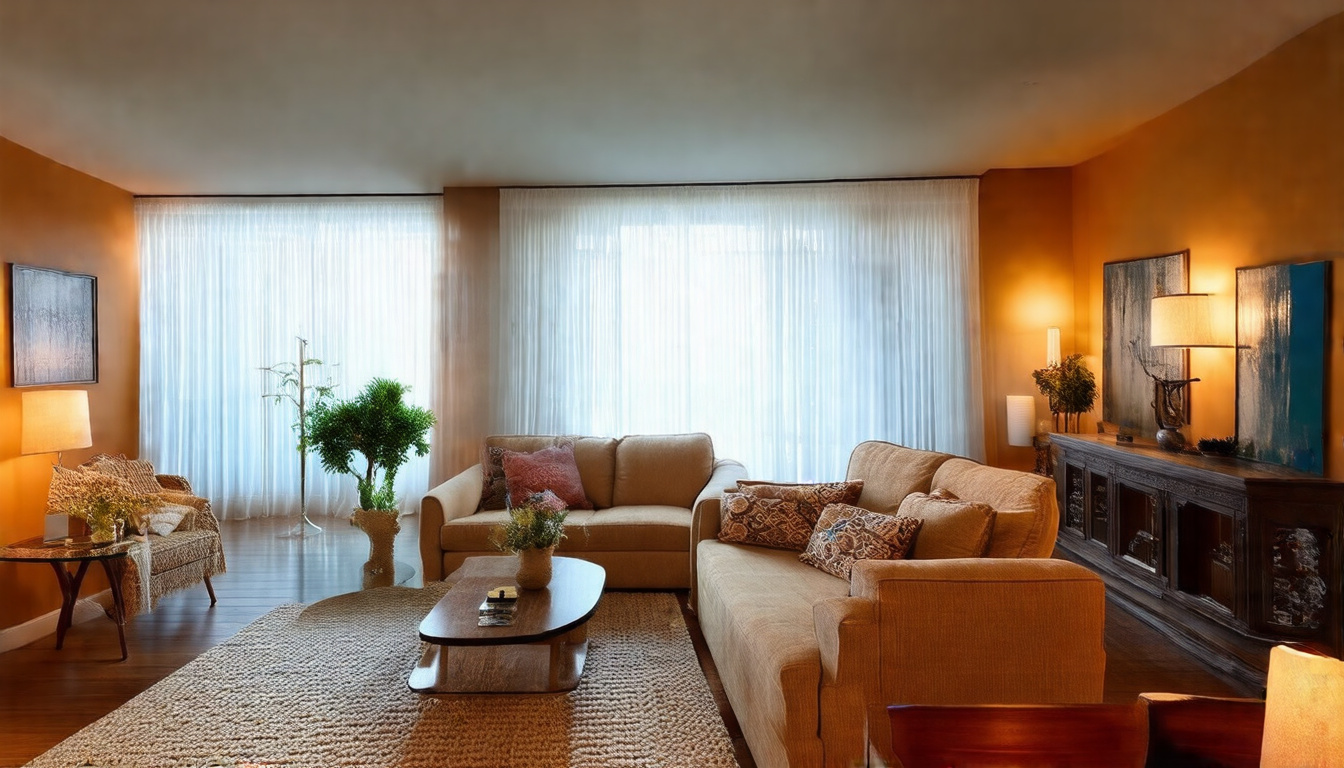
Color grading can add an emotional layer to your images. Warmer tones can create an inviting atmosphere and evoke feelings of comfort, while cooler tones may impart a modern aesthetic. Finally, when exporting your images, consider different formats based on their end use. High-resolution files are essential for print, while web-optimized sizes help in fast-loading online listings.
With these editing tips in mind, you’ll turn raw images into compelling visual stories that showcase properties effectively, ensuring they stand out in a crowded marketplace.
Showcasing the Property: Strategies for Effective Listing Presentation
# Real Estate Photography: Showcasing the Property Through Effective Listing Presentation
## Introduction
Real estate photography is more than just taking pictures of a property; it is an art form that shapes the narrative of a home. In an industry where first impressions are paramount, the role of a skilled photographer becomes essential. The images presented in a property listing can evoke emotion and tell a story that draws potential buyers into envisioning their life within those walls. This article delves deep into effective strategies for showcasing properties through real estate photography, aiming to transform a mundane listing into a compelling visual journey.
## What Is Real Estate Photography?
Real estate photography refers to the specialized discipline of capturing images of properties, focusing on both residential and commercial spaces. This style blends technical skill with an understanding of aesthetics, to highlight the unique features and ambiance of a property. High-quality real estate photographs play a crucial role in marketing listings, as they are often the first interaction potential buyers have with a home. For example, a beautifully shot living room with natural light streaming in can evoke a sense of warmth, while a well-composed kitchen shot can showcase spaciousness and functionality.
## History and Artistic Context
The roots of real estate photography can be traced back to the advent of real estate marketing itself, with early photographs merely serving the purpose of documentation. However, as digital technology evolved, so did the techniques and artistic approaches to this genre. Real estate photography began to embrace elements of architectural photography, where the interplay of light, shadow, and perspective became crucial in capturing the essence of a space. The transition from traditional film to digital photography further revolutionized this field, offering photographers new tools for expression and creativity.
## Technical Breakdown
Understanding the technical aspects of real estate photography is essential for effective presentation. Consider the following key elements:
1. Camera Settings: Use a wide aperture (f/8 to f/11) to achieve a deep depth of field, ensuring that all elements within the frame, from foreground to background, remain in sharp focus.
2. Composition: Follow the rule of thirds to create balanced and engaging images. Including leading lines, such as hallways or staircases, can guide the viewer’s eye through the frame.
3. Lighting: Natural light is often preferred, so shoot during golden hour for soft, flattering tones. For interiors, use a combination of ambient light and flash to illuminate dark corners without overpowering the scene.
4. Lens Choices: A wide-angle lens (14mm to 24mm) allows for expansive views of small spaces and is integral in real estate photography to showcase room layouts effectively.
## Storytelling and Emotional Impact
Every photograph taken in real estate has the potential to tell a story. By adopting a narrative approach, photographers can convey a sense of lifestyle and emotion associated with the property. For instance, a cozy reading nook bathed in warm light can evoke feelings of comfort and retreat. A well-composed shot of an outdoor patio infused with greenery not only shows a feature of the property but also invites the viewer to imagine summer evenings spent under twinkling stars. Therefore, it is essential to consider the emotional resonance of each image, making sure they collectively narrate the experience of living in the home.
## Step-by-Step Guide
To implement effective real estate photography, follow this structured approach:
1. Pre-Shoot Preparation: Communicate with your real estate agent to understand the property’s best features and the target audience.
2. Staging the Property: Ensure the property is well-staged and decluttered. Small enhancements like fresh flowers or strategically placed furniture can dramatically improve the presentation.
3. Setting Up Your Gear: Bring a sturdy tripod, a wide-angle lens, and additional lighting sources. Check your camera settings before starting to shoot.
4. Capturing Images: Begin with exterior shots during golden hour, then transition inside. Take multiple shots from various angles, focusing on both wide shots and detailed close-ups.
5. Post-Processing: Utilize editing software to enhance images, correcting exposure, contrast, and color temperatures to reflect a true, yet appealing representation of the property.
## Common Mistakes to Avoid
1. Ignoring Lighting: Failing to consider natural light can lead to dull images. Always assess the lighting conditions before shooting.
2. Neglecting Preparation: A messy or poorly staged property will detract from your photographs. Always prepare in advance.
3. Over-editing: While enhancing your images is essential, over-editing can cause photographs to appear unrealistic. Strive for authenticity.
4. Missing Key Features: Ensure that you capture all significant aspects of the property, including unique architectural elements, amenities, and outdoor spaces.
## Creative Ideas and Use Cases
1. Twilight Photography: Capture exteriors at dusk to showcase the property in a different light, highlighting landscape lighting and warmth.
2. Virtual Tours: Incorporate 360-degree photography or video walkthroughs to offer a more interactive experience.
3. Highlighting Lifestyle: Use staging that reflects a specific lifestyle—such as showcasing a vibrant dining setup to appeal to families or a minimalist space for young professionals.
4. Before and After Comparisons: If renovations have been completed, documenting this transformation can significantly allure potential buyers.
## Tips From Professional Photographers
1. Use Natural Light: Embrace natural lighting whenever possible, reserving artificial lighting for times when natural light isn’t available.
2. Reflect Emotion: Consider how each shot evokes emotion and captures the essence of living in the space.
3. Practice Patience: Wait for the perfect moment before clicking your shutter, whether it’s waiting for the right light or a passing cloud to diffuse harsh sunlight.
4. Keep It Simple: Avoid overly complex compositions—often, less is more in real estate photography.
## Frequently Asked Questions
1. What equipment do I need for real estate photography?
A DSLR or mirrorless camera, tripod, wide-angle lens, and good-quality editing software are essential.
2. How long does a real estate shoot usually take?
Typically, a shoot can take between 1 to 3 hours, depending on the size of the property and the number of photographs required.
3. Should I hire a professional photographer?
If you want the best result, hiring a professional can significantly enhance the presentation of the property.
4. What is the ideal time of day for shooting?
Golden hour—shortly after sunrise or before sunset—provides the best natural light.
5. How can I make the property look more spacious in photos?
Use a wide-angle lens and shoot from the corners of the rooms to capture more of the space.
6. Is it necessary to stage the property?
While not mandatory, staging can significantly improve the appeal of a home and provide buyers with an idea of how to utilize the space.
7. How many photographs should I include in a listing?
Aim for at least 20 high-quality images to provide a comprehensive view of the property.
8. What editing software is recommended for real estate photography?
Adobe Lightroom and Photoshop are popular choices among professionals for enhancing real estate images.
## Final Thoughts
Real estate photography is a dynamic blend of technical skill and artistic expression. By effectively showcasing a property through careful composition, strategic lighting, and evocative storytelling, photographers can transform a mere listing into an experience that resonates emotionally with potential buyers. Embracing best practices, avoiding common pitfalls, and continuously learning from each shoot allows one to grow in this fulfilling craft. In this way, real estate photography not only sells properties but also communicates the story of a home waiting to be lived in.
Frequently Asked Questions
Why is real estate photography important?
Real estate photography is crucial because it creates an emotional connection with potential buyers, showcases properties in the best light, and can significantly impact online listings, making them stand out in a competitive market.
What equipment do I need for high-quality real estate photography?
Essential equipment includes a DSLR or mirrorless camera, a wide-angle lens to capture more of each room, a tripod for stability, and additional tools like external flash and reflectors for lighting.
How can I take better interior shots?
To capture inviting interior shots, consider using a wide-angle lens, decluttering spaces, arranging furniture to create flow, and strategically placing decor to enhance visual appeal.
What is the importance of natural light in real estate photography?
Natural light helps create bright, vibrant images that make spaces look more inviting. Shooting during the golden hour, when light is softer, can enhance the beauty of the property.
What editing tips can enhance my real estate photos?
Use editing software to adjust brightness, contrast, and saturation. Cropping to improve composition and correcting any lens distortion can also significantly enhance the final image.